Create a centralized Contact & Company data warehouse with SigParser APIs


What We Learned at AEC Innovate 2026: AI, Data, and the Future of Relationship Intelligence in AEC
SigParser automatically captures contact and company data from your email communications, but what about all the valuable information that exists outside your inbox? Lead capture forms, email bounce notifications, CRM updates, and event registrations all contain data that can enrich your contact records and help you build more complete customer profiles.
In this guide, we'll show you how to use the SigParser APIs to create and update Contact and Company records, enabling you to centralize all your relationship data in one place.
Why Push Data Into SigParser?
While SigParser excels at extracting information from email signatures and tracking interaction history, your organization likely has additional data sources that could enhance these records. By pushing data into SigParser, you can:
- Enrich contact profiles with information from lead forms, webinars, and events
- Track email deliverability by recording bounce notifications
- Sync data from other systems like your marketing automation platform or customer support tools
- Create queryable fields for building targeted lists and segments
Understanding the APIs
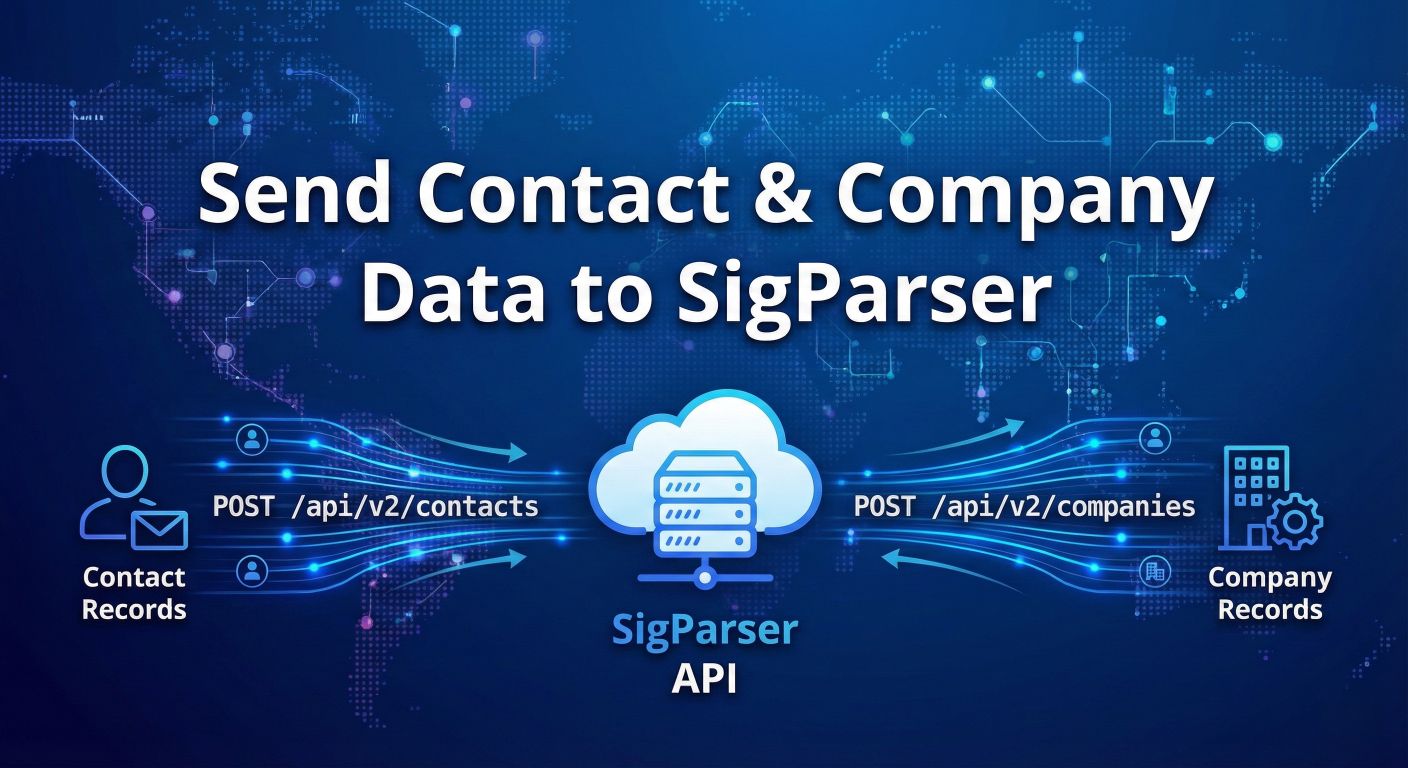
SigParser provides two primary endpoints for adding and updating records.
Contacts API
The POST /api/v2/contacts endpoint allows you to insert or update a contact by email address. The email address serves as the unique identifier—if a contact with that email already exists, the record will be updated; otherwise, a new contact will be created.
You can set standard fields like name, job title, phone numbers, and location, as well as any custom fields you've defined in your SigParser account.
Companies API
Similarly, the POST /api/v2/companies endpoint lets you insert or update a company by domain. The domain acts as the unique identifier for company records.
Setting Up Custom Fields
Before pushing data into SigParser, you'll want to create custom fields to store your additional data points. SigParser supports several field types:
- Text for free-form strings
- Number for numeric values
- Date for timestamps
- Boolean for true/false flags
- Single-select for dropdown options
- Multi-select for multiple choice selections
Custom fields are prefixed with cf_ in API calls. For example, if you create a custom text field called "Lead Source," you would reference it as cf_lead_source in your API requests.
Real-World Use Cases
Use Case 1: Syncing Lead Capture Form Submissions
Every time someone fills out a form on your website, you can automatically create or update their contact record in SigParser. This ensures your sales team has immediate visibility into new leads alongside their email interaction history.
Here's what a typical API request might look like:
POST /api/v2/contacts
{
    "email": "jane.doe@acmecorp.com",
    "name_first": "Jane",
    "name_last": "Doe",
    "job_title": "Marketing Director",
    "phone_direct": "555-123-4567",
    "cf_lead_source": "Website Contact Form",
    "cf_form_submission_date": "2024-12-15",
    "cf_interested_products": ["Enterprise Plan", "API Access"],
    "cf_marketing_consent": true
}
In this example, we're setting both standard contact fields and several custom fields to capture the lead source, submission date, product interests, and marketing consent status. Later, you can query SigParser to build lists of all contacts who came from your website form or who expressed interest in specific products.
Use Case 2: Recording Email Bounces
Email deliverability is critical for sales and marketing teams. When your email system detects a bounce, you can push that information into SigParser to maintain accurate contact records and prevent wasted outreach efforts.
POST /api/v2/contacts
{
    "email": "old.address@defunct-company.com",
    "cf_email_bounced": true,
    "cf_bounce_date": "2024-12-10",
    "cf_bounce_reason": "Mailbox not found"
}By tracking bounces in SigParser, you get a more complete picture of each contact's status. Your team can filter out bounced addresses when building outreach lists, and you can identify patterns like companies going out of business or contacts changing jobs.
Use Case 3: Enriching Company Records
You can also push company-level data into SigParser. For example, after a sales call, you might want to update a company record with information learned during the conversation:
POST /api/v2/companies
{
    "domain": "acmecorp.com",
    "company_name": "Acme Corporation",
    "company_employees_range": "201-500",
    "industry_primary": "Manufacturing",
    "cf_annual_revenue": 50000000,
    "cf_fiscal_year_end": "December",
    "cf_current_email_provider": "Microsoft 365"
}
Integrating with Low-Code Tools
While you can call the SigParser API directly from your applications, low-code integration platforms make it significantly easier to connect your various systems without writing custom code. These tools provide built-in features like retry logic, error handling, and logging that would take considerable effort to build from scratch.
Zapier works well for simpler, straightforward workflows. If you need to connect a form submission directly to SigParser with minimal transformation, Zapier's intuitive interface makes setup quick and easy.
Make (formerly Integromat) is better suited for more complex workflows that require conditional logic, data transformation, or multiple steps. If you need to enrich data from multiple sources before sending it to SigParser, or if you want to branch your workflow based on certain conditions, Make provides the flexibility you need.
Both platforms allow you to import the SigParser Swagger/OpenAPI specification, which automatically configures the available endpoints and parameters for you.
Authentication
All API requests require authentication via an API key. Pass your key in the x-api-key header with each request:
x-api-key: your_api_key_here
You can generate an API key from within the SigParser application if you have the appropriate subscription and role permissions.
Best Practices
Be selective about what you update. The API only modifies fields you explicitly include in your request. Omitting a field leaves its current value unchanged, so you don't need to send the entire contact record for simple updates.
Use null to clear values. If you need to remove data from a field, pass null as the value rather than omitting the field entirely.
Plan your custom fields thoughtfully. Before creating custom fields, think about how you'll use them for querying and list building. Well-designed fields make it easier to segment your contacts and companies effectively.
Getting Started
Ready to start pushing data into SigParser? Here's how to begin:
- Define your use cases. Identify what data sources you want to connect and what information you need to capture.
- Create your custom fields. Set up the custom fields in SigParser that will store your additional data points.
- Choose your integration method. Decide whether you'll use a low-code platform like Make or Zapier, or build a direct integration.
- Test with sample data. Start by pushing a few test records to ensure your field mappings are correct.
- Monitor and iterate. Once live, review your data regularly to ensure everything is flowing correctly and adjust your integration as needed.
By combining SigParser's automatic email intelligence with your own data sources, you'll build richer contact and company profiles that give your team the complete picture they need to build stronger relationships.
Have questions about integrating with the SigParser API? Contact our support team at support@sigparser.com.